Ok so, as promised in my previous post, here's a little tutorial for my mushroom trees.
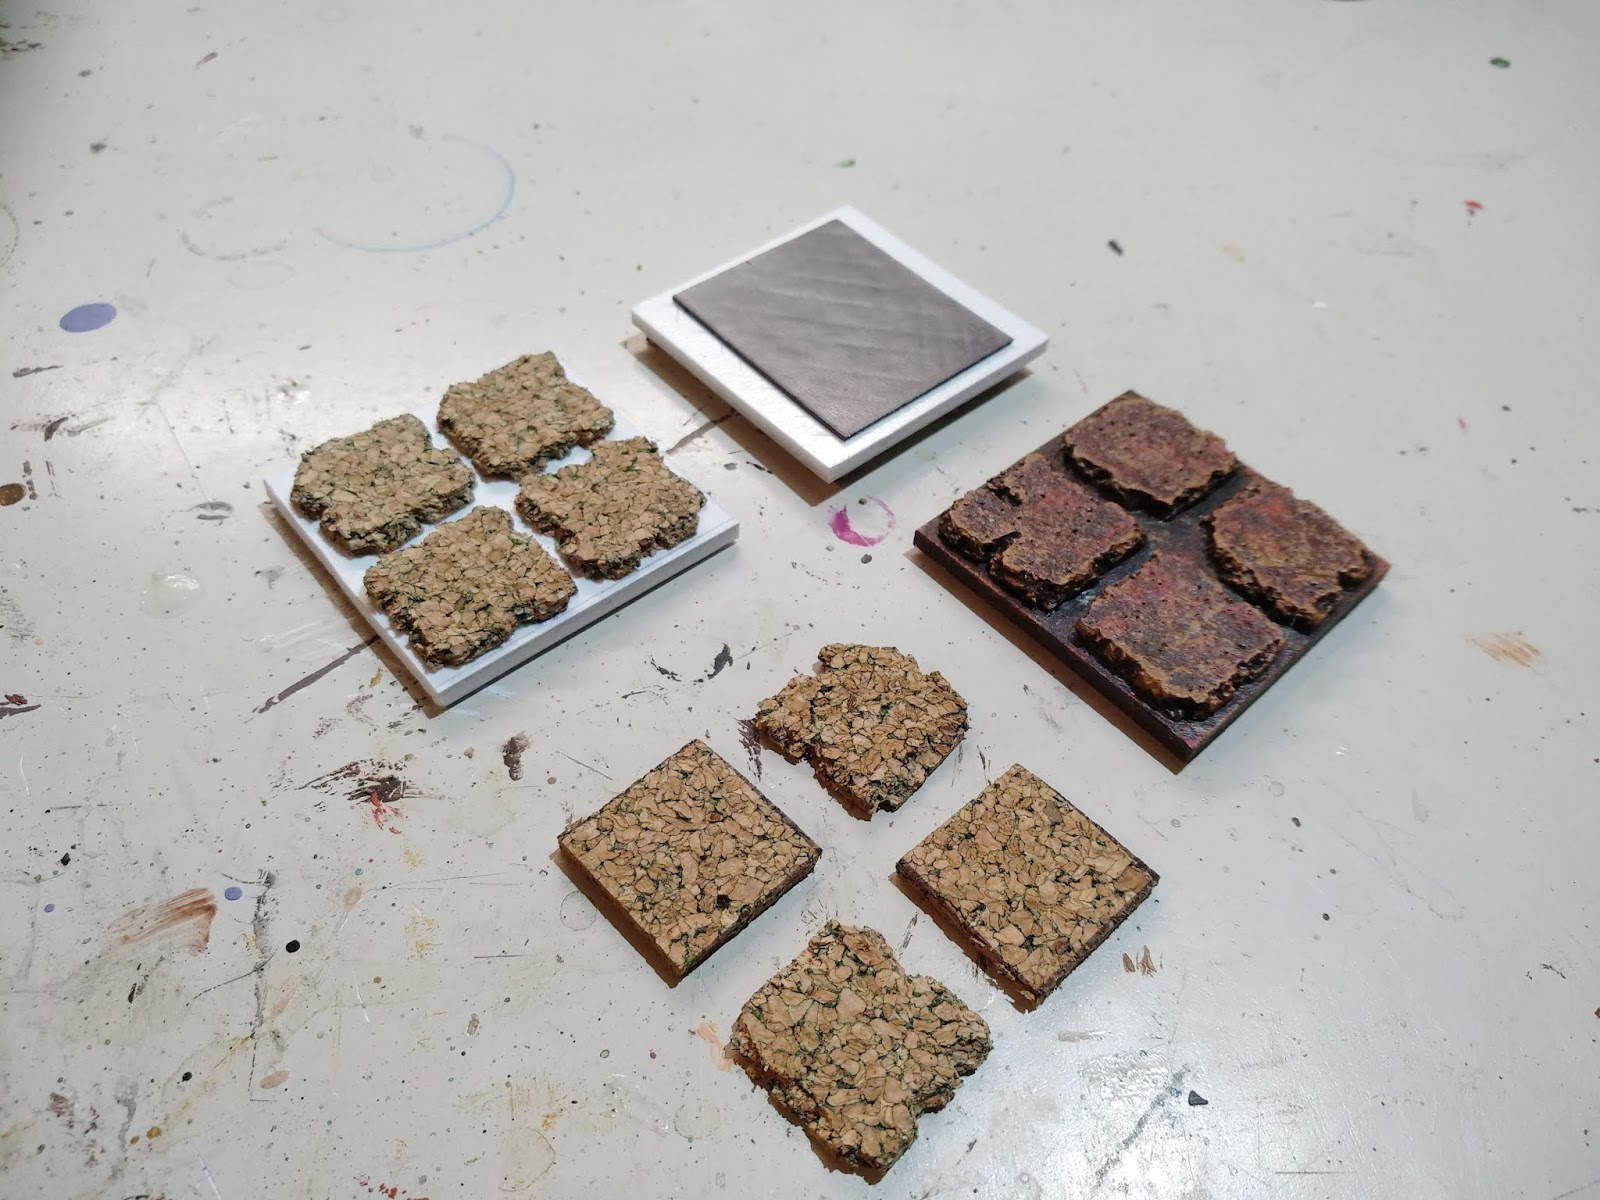
First though, because some people have asked about them and because my trees are based on them, a quick rundown of my basic cavern tiles.
The tiles are cut from 3mm perspex , its a material kind of like foamcore but more dense / sturdy. It doesn't warp as easily but can still be cut with a hobby knife.
The stone texture on top is simply corck tiles with the edges roughed up so the are more of an irregular shape.
And then underneath the tile I stick a square of magnetic paper so the tiles don't slide around on the board.
"Ok, enough about the stupid tiles!"
"We want to know about the mushroom trees!"
Right, lets get cracking...
You start by twisting floral wire into a general tree shape, just like you would while making standard wargame trees.

Then you bulk out the tunk and branches with aluminium foil.
I've found that rolling the foil into a kind of loose sausage makes it a lot easier to wrap it around the armature as the tend to hold their shape better once you compress them down.
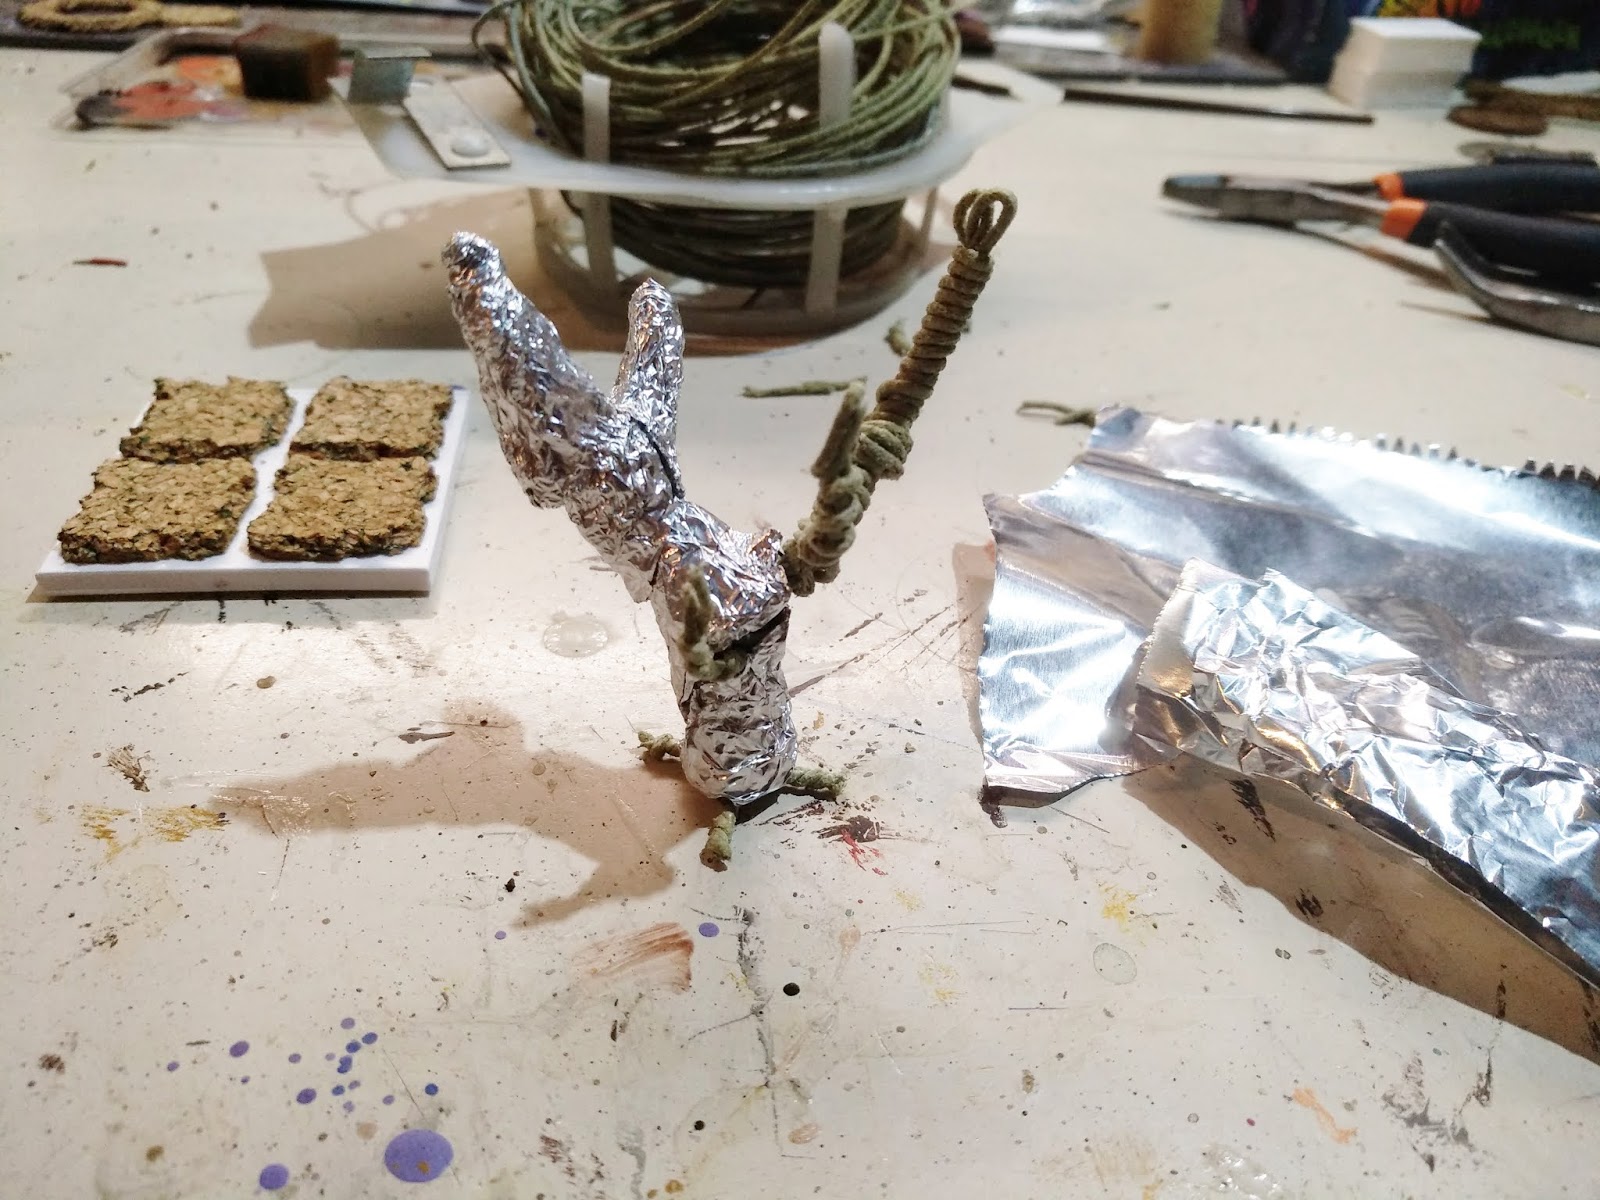

Next you glue the tree to the base and then you cover the entire thing in a layer of hotglue.

Once the entire thing is covered in hotglue its time to start texturing it.
You could probably do this with the tip of your hotglue gun but the nozzle on mine proved to be a bit to bulky so I opted to use a sculpting tool with a small round head.
Simply heat it over a candle flame and drag it through the hotglue to create a bark like texture.

Once thats finished you can hit it with a quick blast from a hairdrier to get rid of any hot glue whisps that may have developed ( not to long or you'll melt the texture too)
And finally we come to the more familliar medium of two part epoxy putties.
I chose to do the caps in plumbers putty, because I'm an impatient gith and that stuff sets in five to ten minutes, but you can just use green stuff if that's all you have.

Then its just a matter of sculpting the roots, the nodules on the bark and the spots on the caps. Nothing to complicated, just roll some balls and sausages and stick them on where ever you like.

And now you have your very own mushroom tree, just prime and paint it any way you like...

I hope all of that made at least a bit of sense to you, If you have any questions I'll be happy to answer them all in the comments.
Cheers,
Stroezie.
Lovely work on the Mushroom tree!
ReplyDeleteI'll have to have a go at making some of my own.
Thanks!
DeleteI look forward to seeing your take on them.
Excellent stuff, they came out really well :-)
ReplyDelete